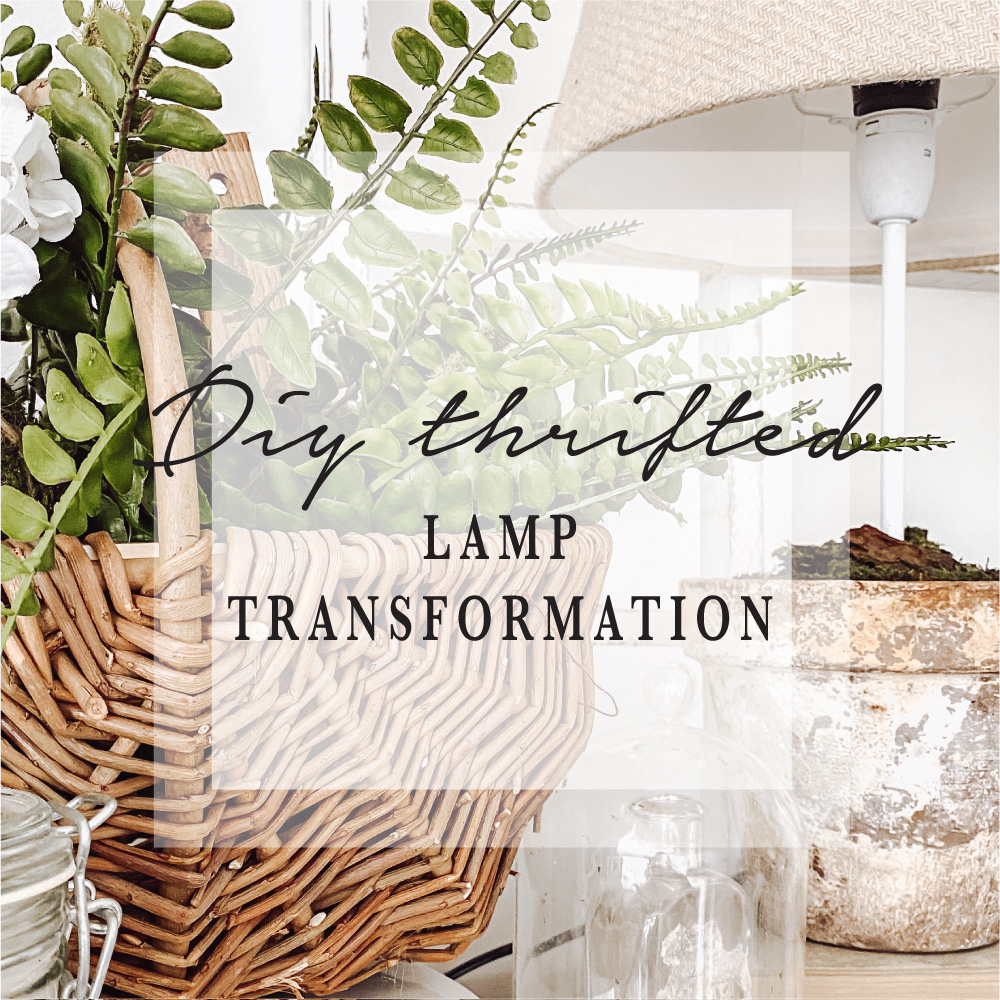
Who else loves thrifting for home decor? Whether it be something I actually need or something that will sit in my garage for months calling out for a make over, I just love finding things that I can transform. I spend a lot of my spare time wandering into charity shops or strolling through car boot sales on a Sunday morning, looking for treasures.
I have had a very basic lamp with nothing special about it sitting in my junk stash for the best part of a year & the other day I decided to give it new life. I really do struggle to throw things away. Does anyone else relate?
Lighting can bring coziness to a space & our living room has so many nooks that are missing just that, so I decided to transform this lamp into something I love!
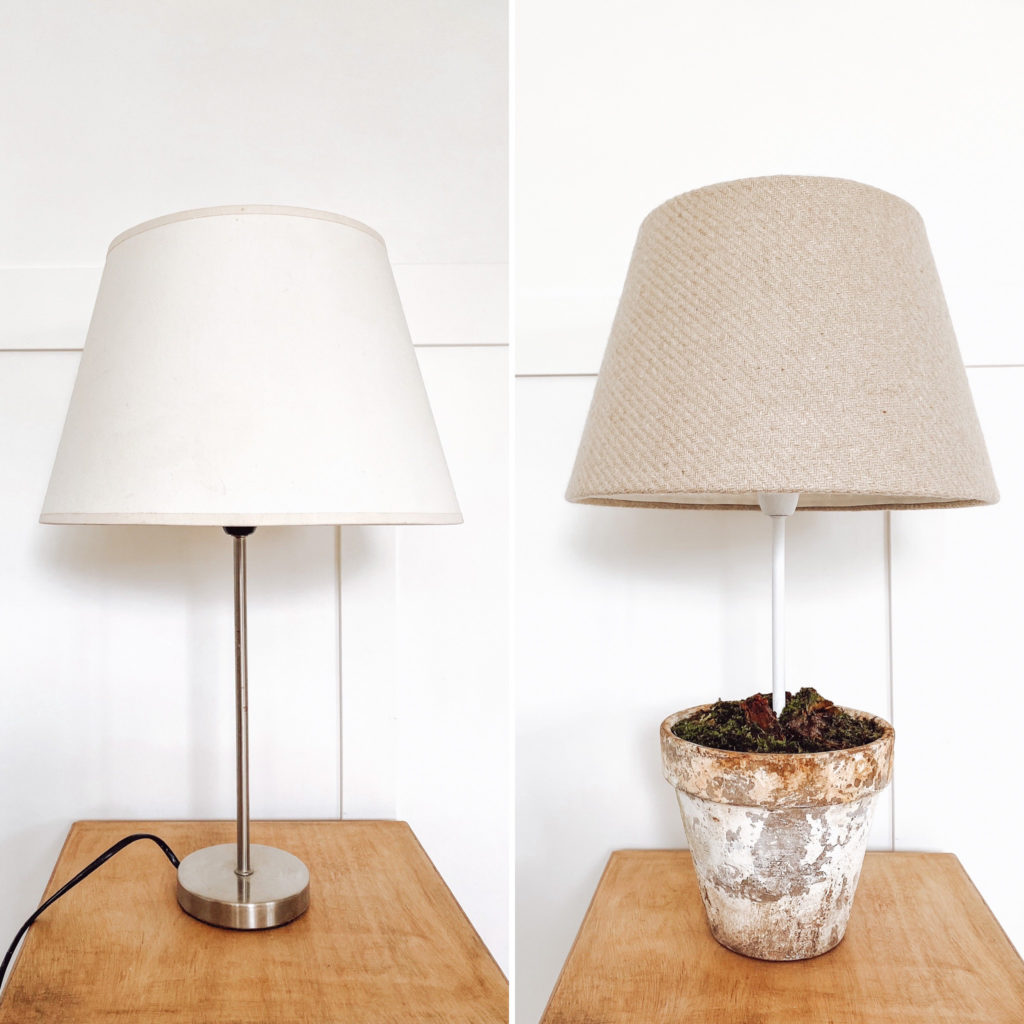
Below is the before & after & i’m going to show you how to transform boring into wow!
This is a very simple transformation that can be adapted to fit your own home style.

- Thrifted lamp
- Spray paint (colour of your choice)
- Terracotta pot
- Tinfoil
- compost
- small stones
- PVA glue
- Drill
- Large drill bit
- small screw driver
- Spray adhesive
- Fabric scissors
- Glue gun & glue sticks
- Fabric (of your choice)
- Fabric trim or binding

First of all, remove the lamp shade & give the base a good old clean.
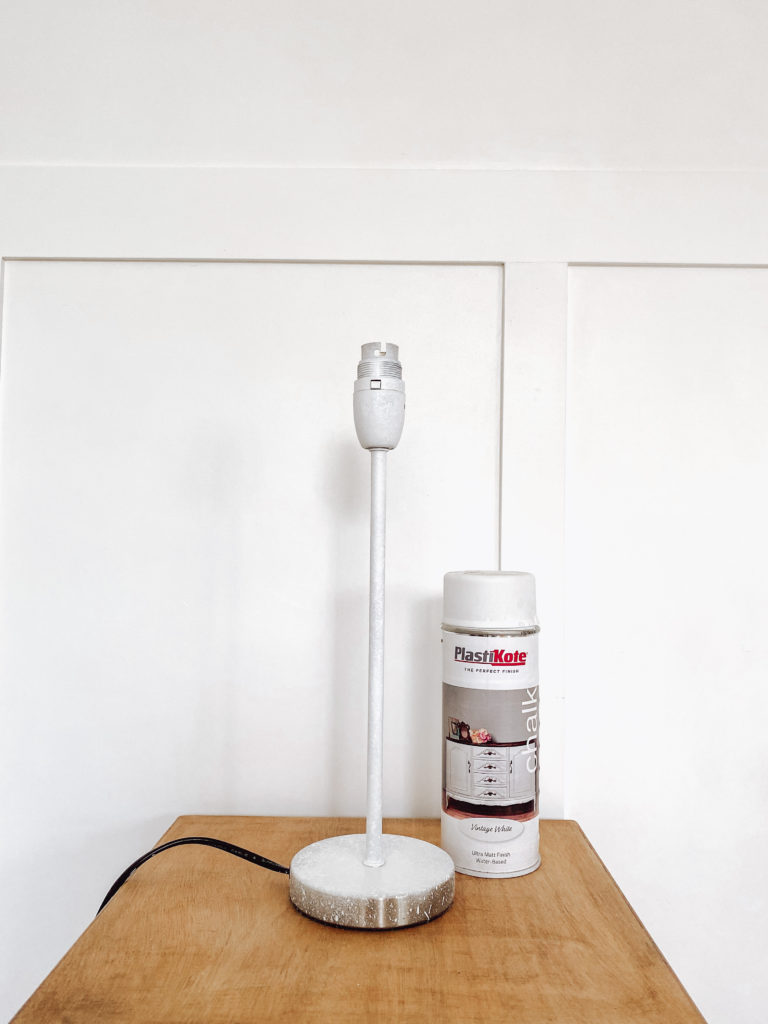
Next spray paint the base using your preferred colour. I used a chalk finish spray paint in vintage white.
Allow to dry completely.

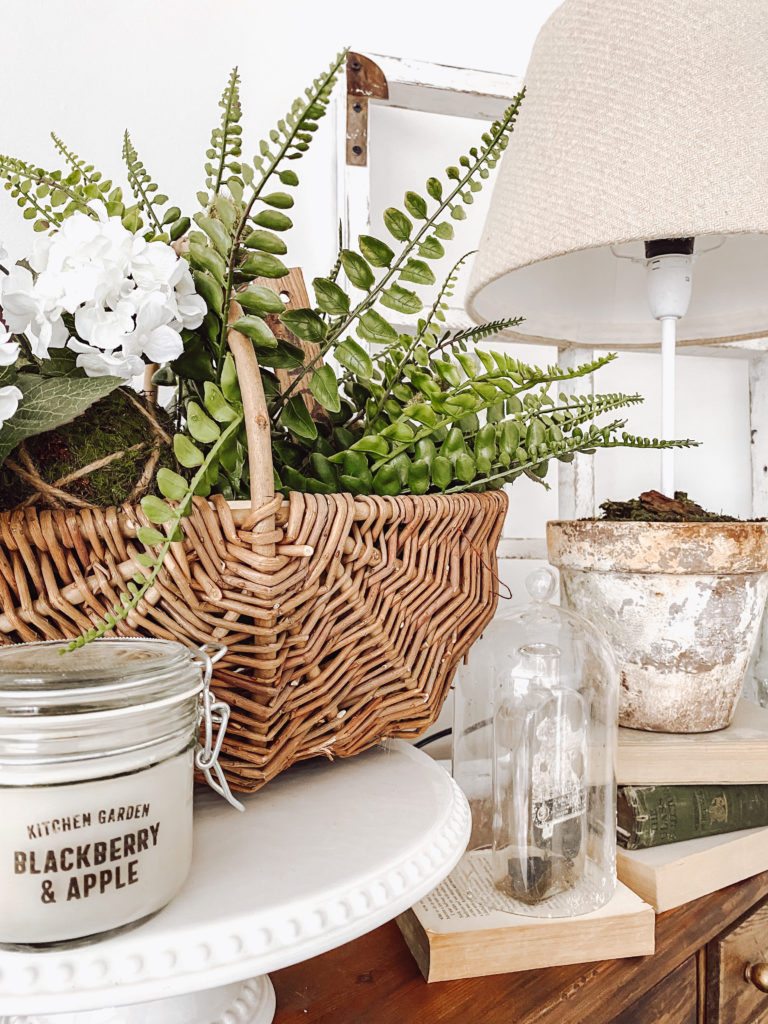
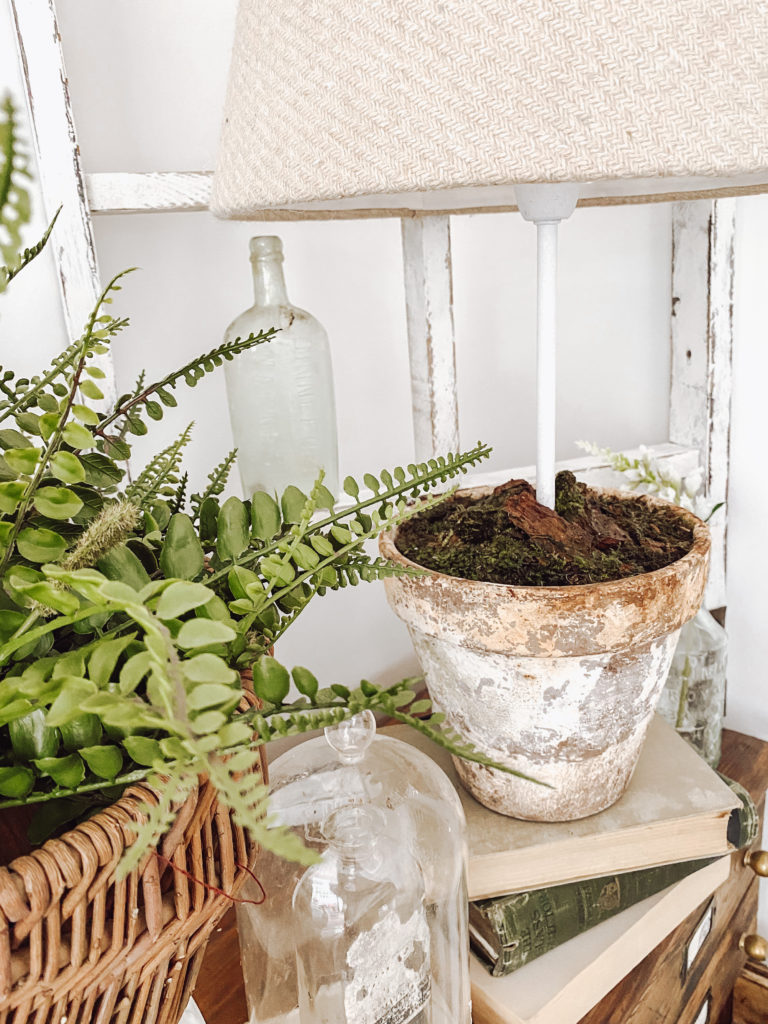
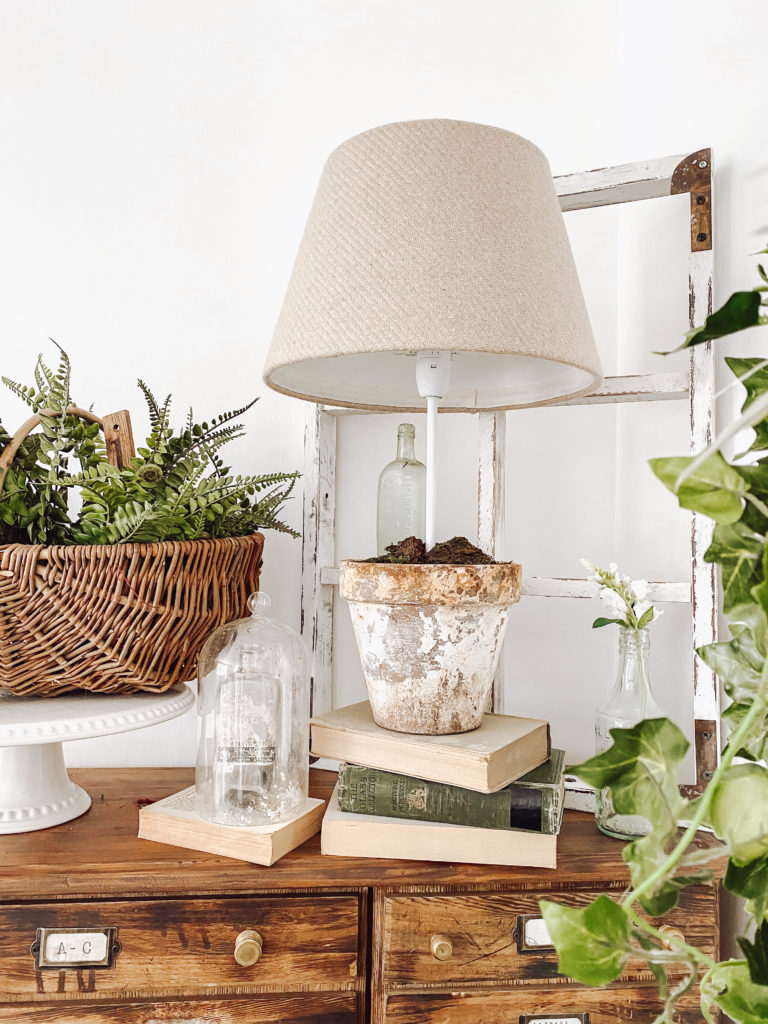
For the potted base I chose this aged terracotta pot that has actually been buried in our garden for a while, but just look at all the chippy goodness! The good thing about terracotta is that it is easy to drill a hole in. When choosing your pot make sure the diameter is wide enough at the narrowest part to fit the base of the lamp. You can use any pot but just be mindful that other ceramics may crack.
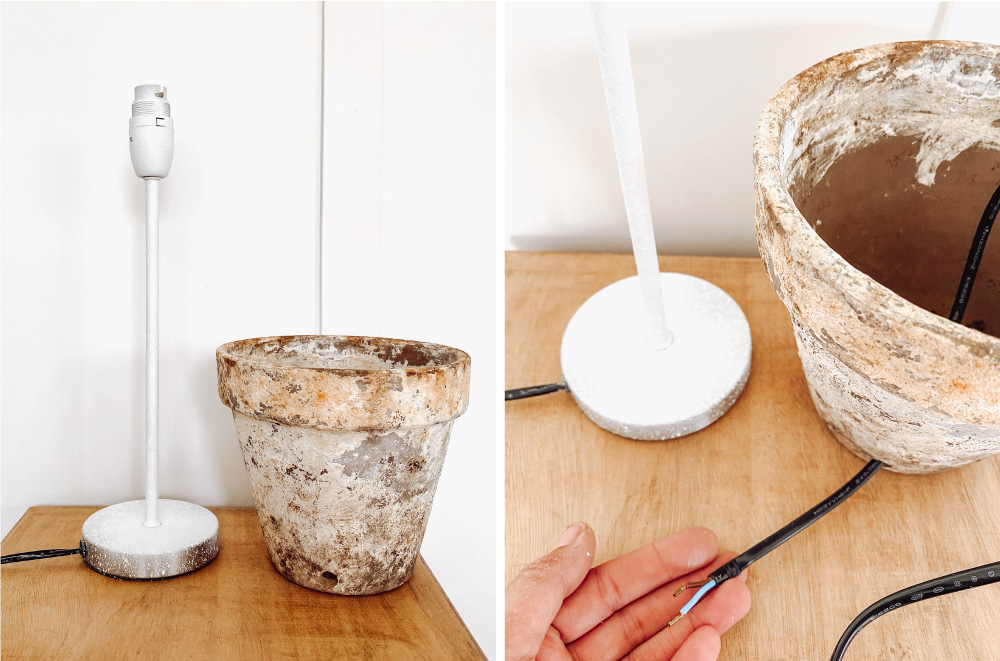
I used a large drill bit to create a hole wide enough for the lamp wire to go through. I gently drilled the hole at the very base of the pot using light pressure.
Next unscrew the plug & remove the wires from the terminals & keep all screws & components safe until you are ready to fit the plug again.
Thread the wire through the hole from the inside of the pot.

Carefully place the base of the lamp into your chosen pot, threading the wire fully through the hole. Things may seem a little unsteady, but you are going to pack it in place.
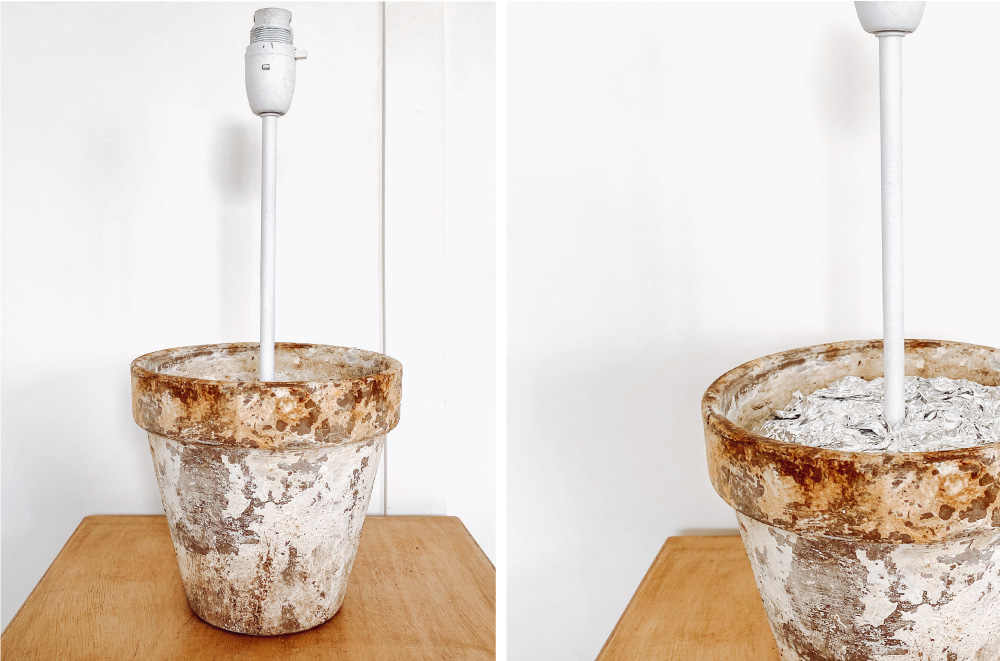
I used scrunched up tin foil to secure the lamp base in place as its great for moulding & forms a really sturdy surround. Make sure you keep the lamp stem centre of your pot when packing in place.

Let’s get messy!! Now this special mix is great to weigh things down & secure it all in place, plus it looks natural which is exactly what I wanted for my chosen look. Also it dries hard so there is no need to worry about soil spilling everywhere.

In a throw away tub, mix together compost, small stones & pva glue. The consistency shouldn’t be too wet so make sure you add a little pva glue at a time. Think cake mixture!
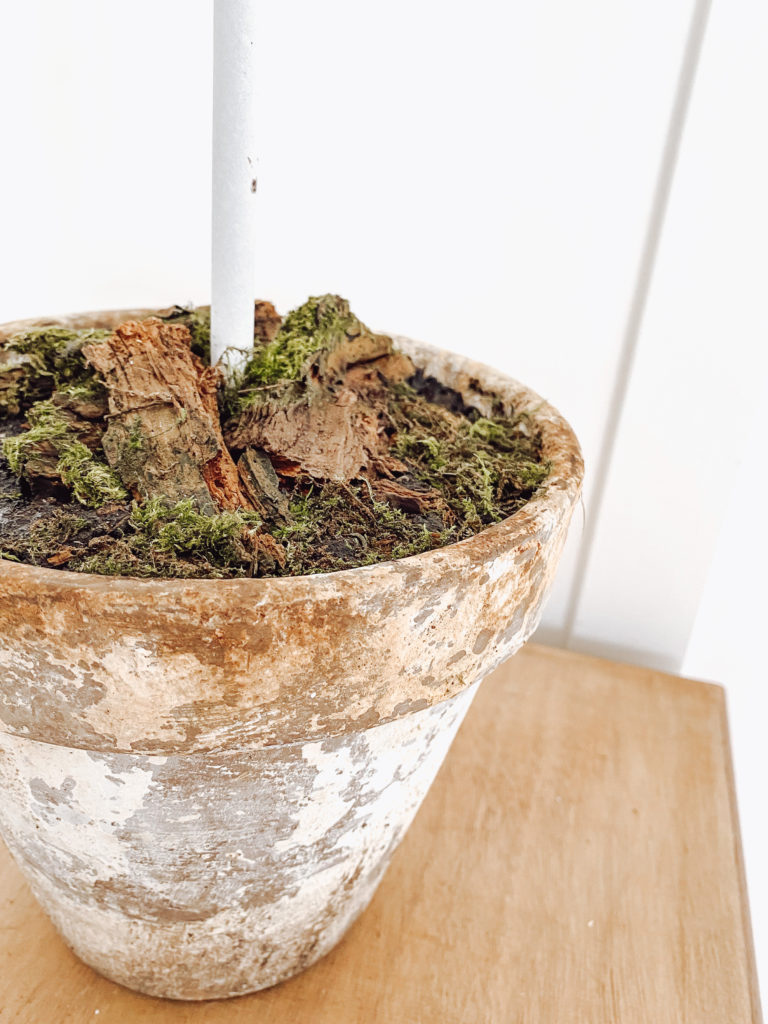
Gently spoon on the compost mixture & spread evenly ensuring all the tin foil is covered. For a natural look I decided to add some bark & moss. Just make sure you add a layer of clear pva glue to preserve it & set in place.
Wait 24 hours for the soil to completely harden.

Now it’s time to cover the lamp shade. I raided my fabric stash & found this neutral tweed fabric.
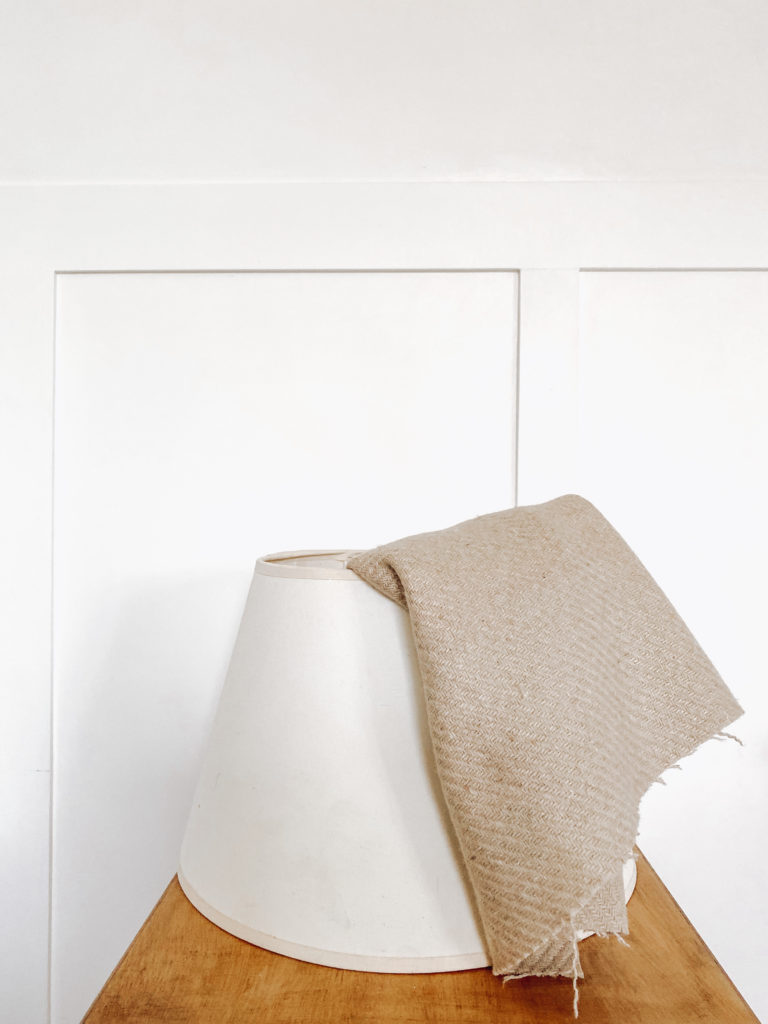
Lay your fabric out & roll the lamp shade from corner to corner, marking with a pencil as you go. Cut out this shape allowing at least 1cm outside of the pencil line for folding over the frame. By following this pattern you will avoid any pleating & the fabric will lay flat.
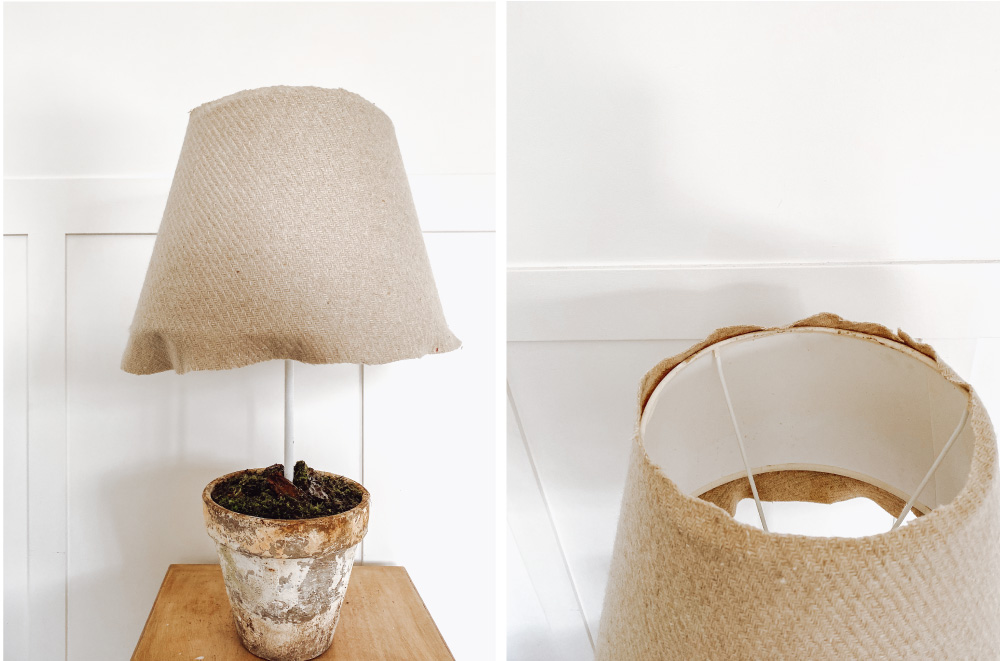
Start by spraying the whole surface of the lamp shade with spray adhesive, then position fabric in place. Starting at the top, glue the excess fabric over the frame with a glue gun.
Turn the shade over & repeat on the bottom edge.
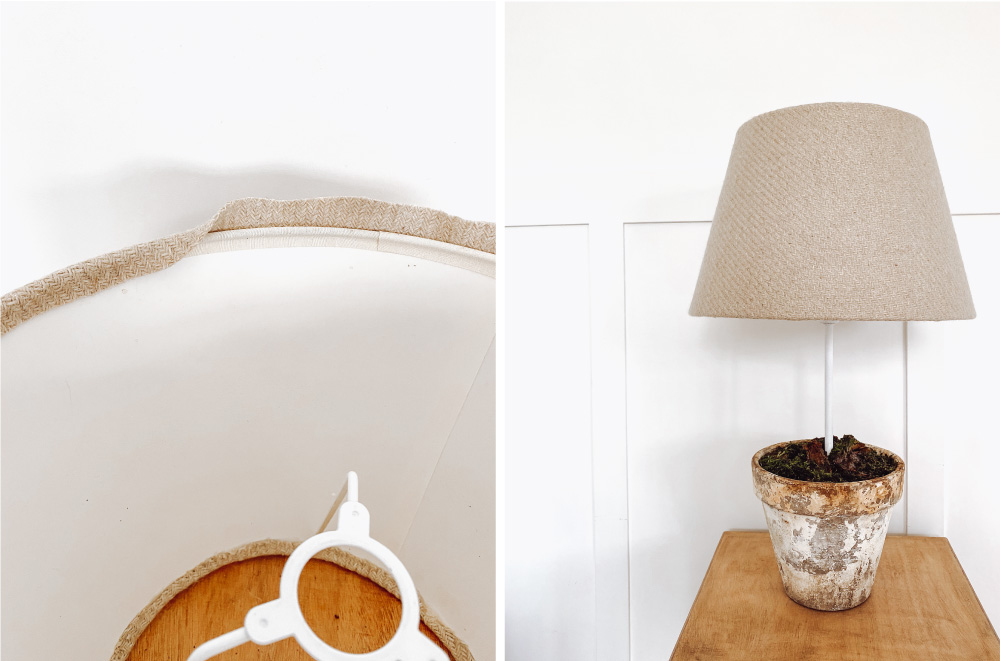
To give this a finished look I glued some neutral fabric binding to the raw edge on the inside. Don’t forget to re wire the plug!
And that’s it…a simple, affordable transformation.
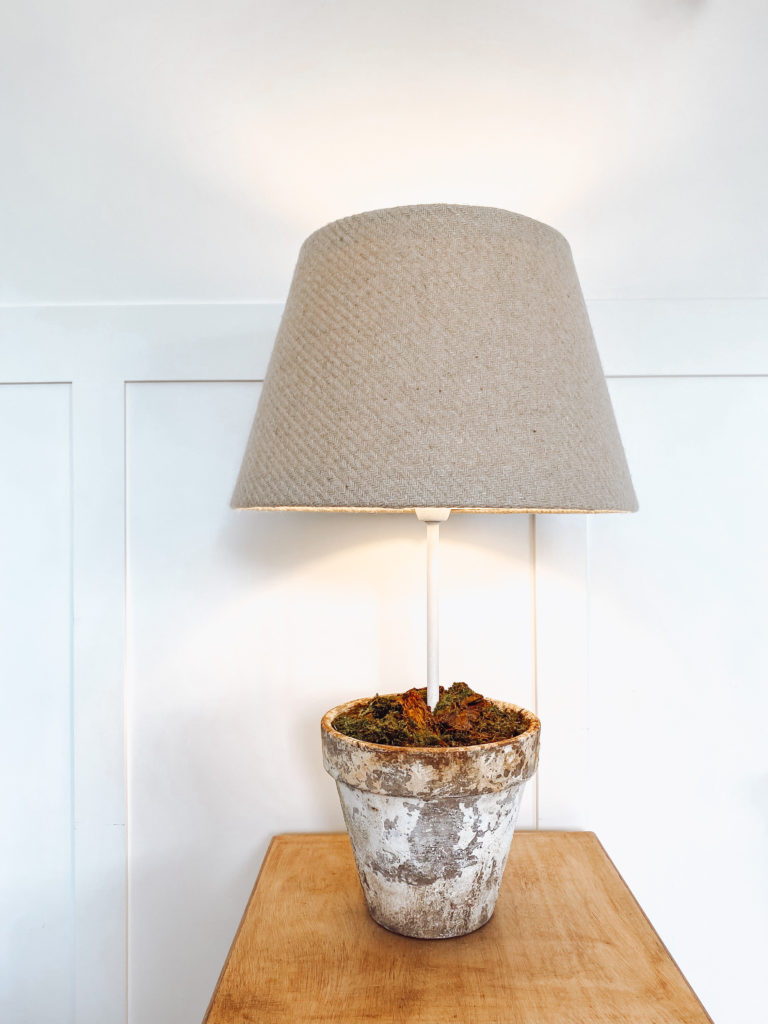

I’m so pleased with how it turned out & it looks much more stylish than before.
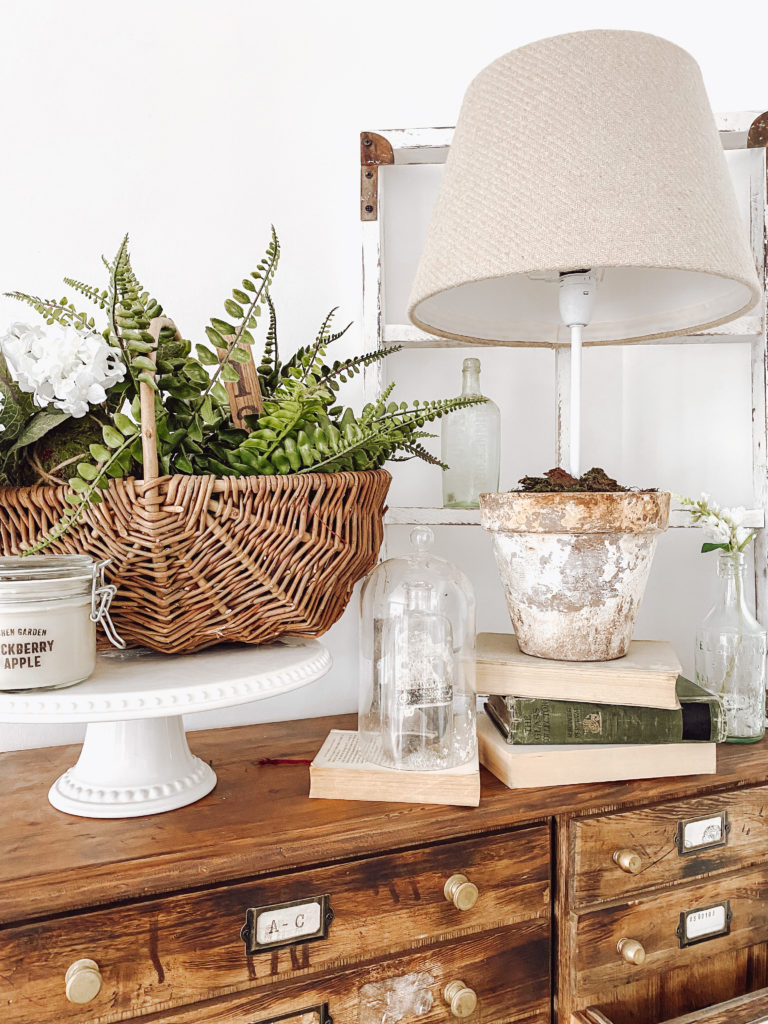
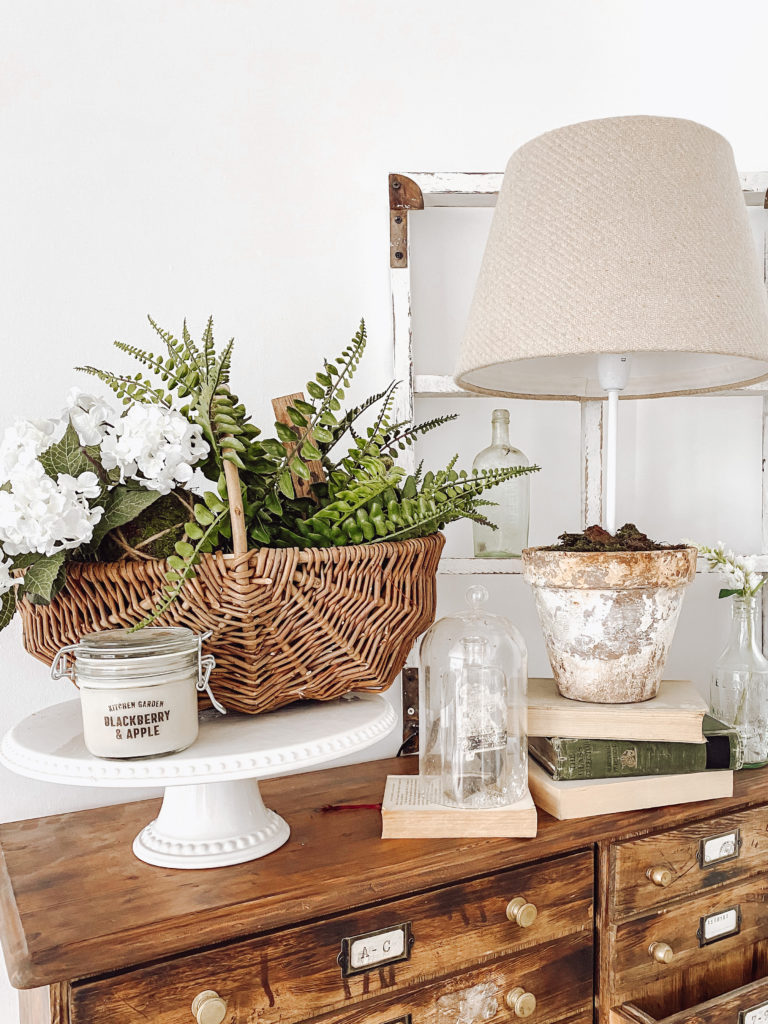
I carried out this project with my apothecary drawer unit in mind. It sits in a corner in our living room & needed some cozy light.
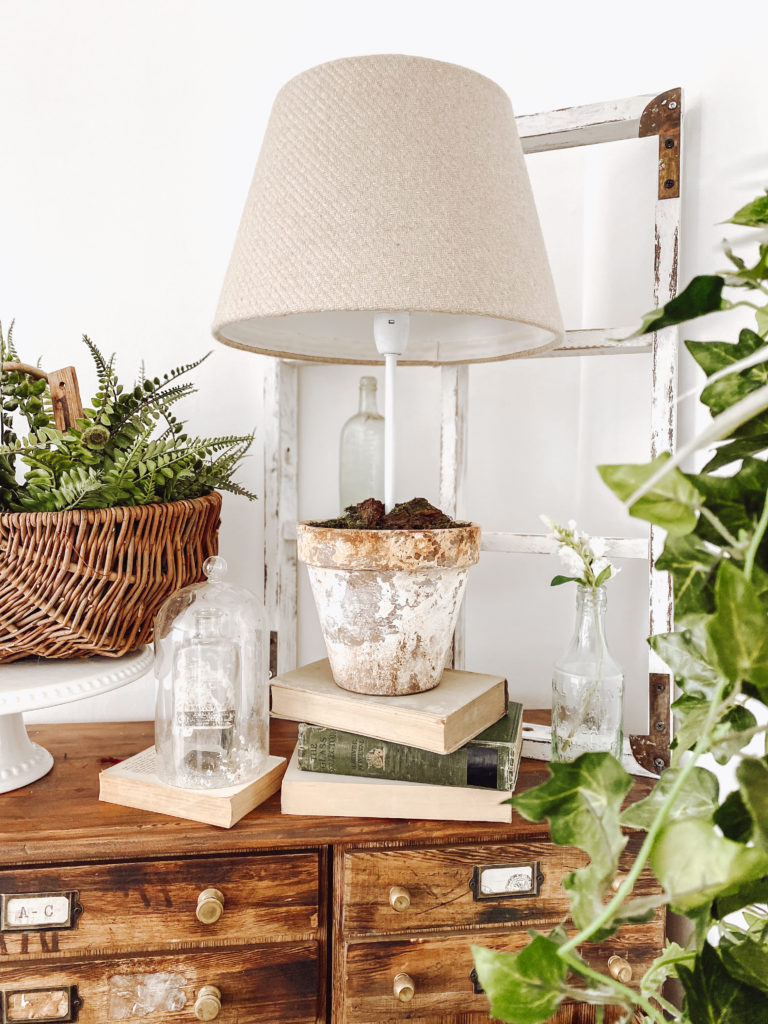
Try adding a window frame to the back to create shadows & patterns & stack vintage books to add a little height to your styled space.
It really does fit in with the natural, potting shed look I went for this year & I love all the different textures.
Who would have thought a boring, dated lamp could look so beautiful.
I hope I have inspired you to try out this simple diy! Tag me in your photos on Instagram, I would love to see your ideas & take on this!
Thank you so much for reading the blog today! Happy diy-ing friends! Let me know what you think in the comments below.
Lots of love
Anna xx